
During our first demo phase, we tore out the built-in couch. It was the only way to get to those semi-rotted floors. Plus, it was uncomfortable to sleep on AND it was hideous (I haven’t learned to reupholster yet…especially when the cushions don’t come off). Because our walls are curved and we need to utilize every square inch of space carefully, I decided to build a new couch into the space. What?
Yes! It’s the only way to get exactly what you want, right? Well, it’s the only way if ya don’t wanna spend a fortune. Aaaand I don’t. So, for those of you thinking, “No way. There’s no way I can do that; I have little to no woodworking skills.” Welp, neither do I! And if I can do it, then you can do it!
Now, in my la la dream land I have a chop saw-you know, that thing that cuts nice pretty angles while keeping your boards all steady? Yeah no. In reality, I have a circular saw, a jigsaw, and a hacksaw. I asked for one for Christmas two years ago but it didn’t happen. And now, we have nowhere to store one anyway. But moving on…
The short version is that my boards were not perfectly equal to one another nor were they even level. Ahhhhh! But ya know what this OC(P)D girl learned? It didn’t actually matter in this particular case. I used pine 1x3s for the frame and 2x4s for the upright supports, then I used 3/4 inch plywood for the top. Here’s the frame…
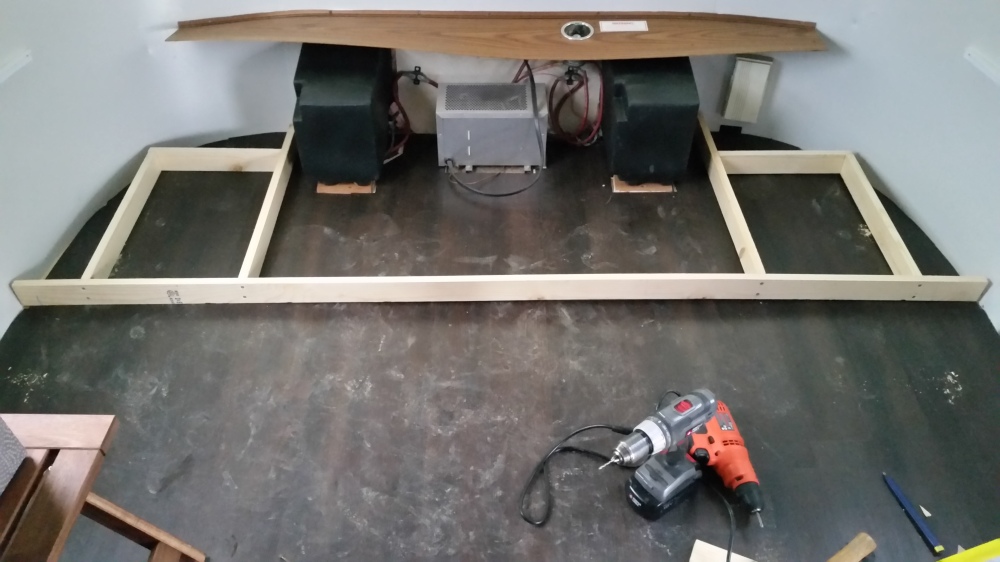
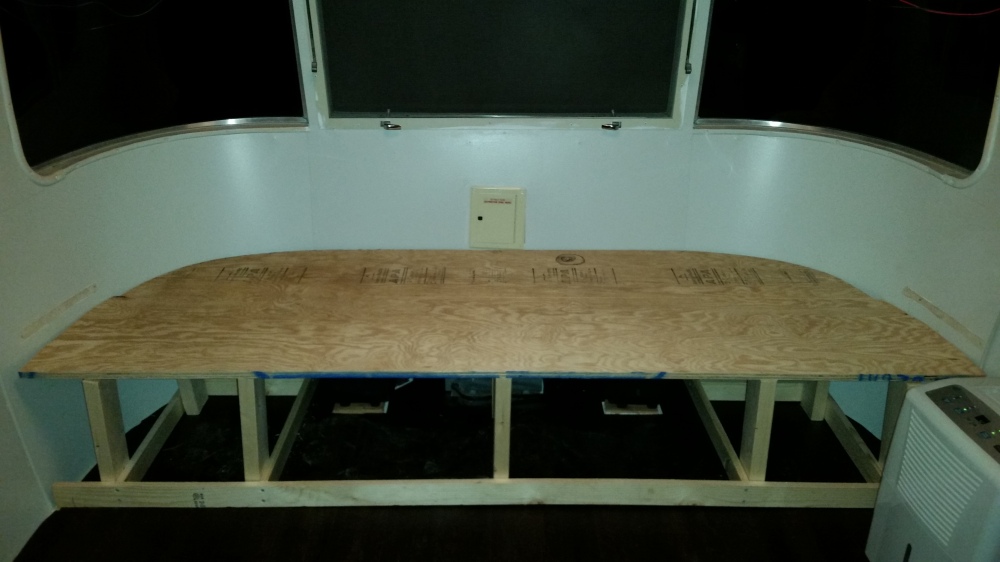
After I had the frame, I added the boards that would support any weight on the couch. Then, it was time to cut those crazy curves into my plywood for the top. I’ll be having nightmares about that for a while.
There it is, y’all! Nothing was screwed into place at the time of this photo, in case you’re wondering why the support boards are all wonky. It was just a dry fit, but I got tickled all the same! There are 2 supports in the back that you can’t see and I added two more-one on either side of the converter-after this photo, making a total of 11 supports.
Yup, it’s sturdy! Oh and it has three metal supports underneath the plywood riveted into the wall (I reused them from the old couch.). You can see where I didn’t take them down to paint and I now need to go back and touch up those areas. I thought I’d just build the couch to that height but then the fuse box in the back wouldn’t have opened.
I decided to cut the top in half on the horizontal and hinge it to get to the storage space underneath more easily when necessary. This also helps in not having to lift practically an entire piece of thick, heavy plywood to get to some of the storage space. I’ll add pictures of that later.
I did NOT take photos of my steps when building this thing because I was figuring it out as I went…and it’s embarrassing how bad those cuts really were. You see those rounded edges? I actually ended up having to make those initially with my circular saw…and partially in the dark! Thank goodness I was able to get a new blade later and go back at it with the jigsaw…also in the dark. Anyway, I’ll be happy to describe my steps in detail via email if anyone decides they’re interested to know how I did this.
And for good measure, I’ll show you just how bad a couple of my cuts were. We are keeping it real here, after all…
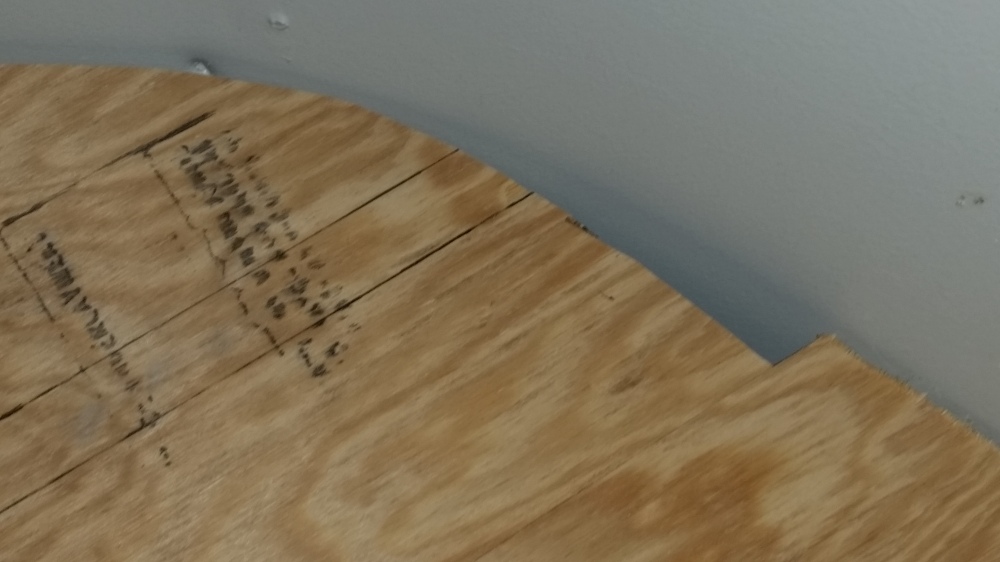
It’s not that drastic now because I had to go back and shave some off of that straighter board so it wouldn’t rub the walls. But, great news. It’s all getting covered up with cushions! Yay!
I hope to have the cushions and back pillows made, the boards visible from the front painted, and some useful storage bins and curtain skirt made around the new year. Let’s hope together! We neeeeed somewhere to sit besides our beds! All of that will be Part II of that one time I built a couch. ; ) Cheers!


You are good girl!!! I can’t wait to see the cushions you have made! It’s going to be the cutest RV ever. 🙂
LikeLike
Awwwwwww! Thank you for both of your sweet comments! I have so many projects to add to the blog. We’ve added a bathroom sink and redone the entire kitchen. Gotta catch back up ASAP! Stay tuned…
LikeLike